About Me

My photo
Hampshire, United Kingdom
In July 2010 I graduated from KLC School of Design in London with a Professional Diploma in Interior Design (please see the tabs below for course details and project portfolios). Since September 2010 I've been working for a local interior design practice just outside Alton in Hampshire. Through this blog, I hope to share with you products which I like and things which inspire me - together with the odd post about my own home which is a working project. A good home is never finished!

Monday 13 December 2010

Bathroom Progress - We're Getting There!


We're getting there but this bathroom has not been without its problems! 

At the end of my last post, the ceiling lights were dangling out of the ceiling.  Since then we have put the coving up, painted the ceiling/coving and fitted the bezels on the lights.  The walls won't be painted white, that was just the watered down paint on the new plaster.


We positioned the bath and base units to see how much of the floor needed boarding before the floor was tiled, and then I spent an hour or so marking the floor at intervals of 150mm whilst my husband screwed it to the floor - tedious!
Because the units sit on very low feet (they don't have legs which can sit behind the floor tiles with a plinth which clips to the legs) we had to get the floor tiled before we did anything else as we wouldn't be able to tile under them - or the tiler wouldn't!


Having done that we were ready for the floor to be tiled and we're really pleased with the result.

The next thing we did was to level and fix the bath.  The bath panel is a fixed height and so we couldn't fix the bath to the wall or floor until we knew the finished height of the floor.  Fitting the bath was more time consuming than we thought it was going to be - each time we got it level, then made attempts to fix it to the floor and wall it moved and then wasn't level and it has to be level front to back as well as along the length - you get one bit level and then the rest isn't!  We got there in the end but it took all day!

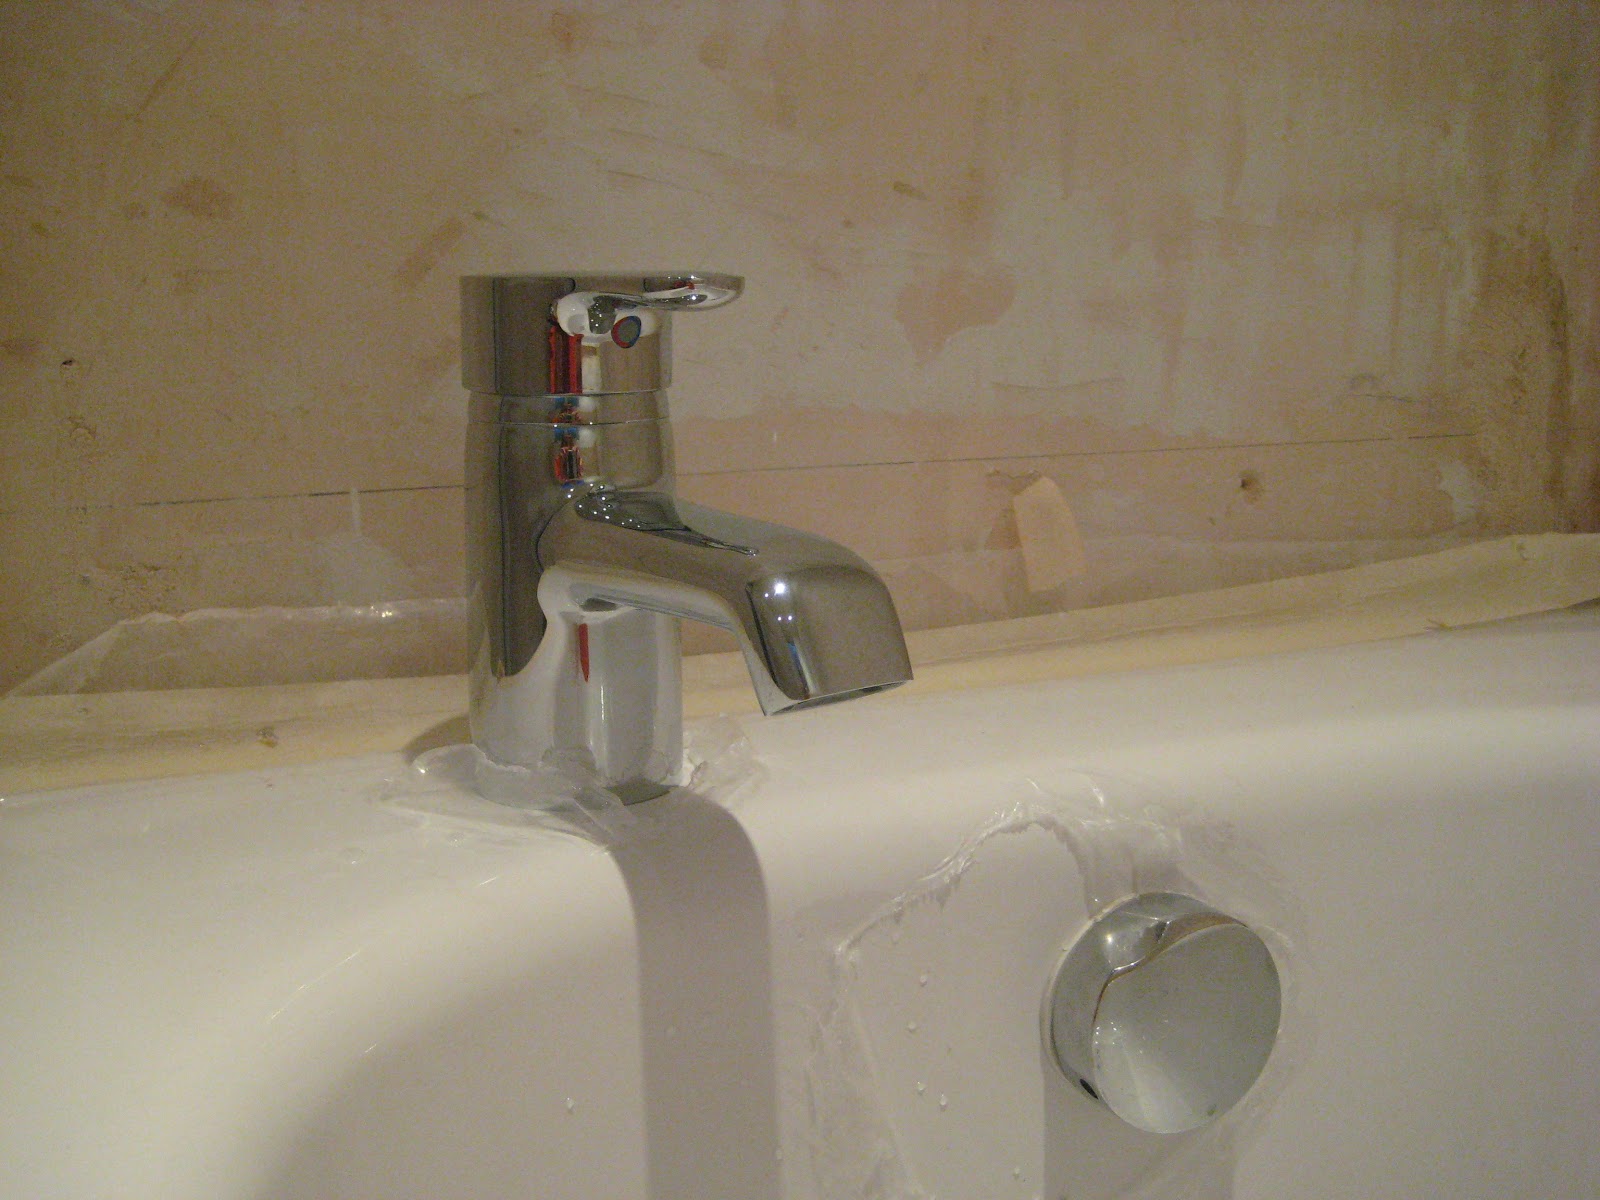
Ideally you would fit the tap and pop up waste before fixing the bath as it's just easier to get to all the fixings without the restrictions of working in a limited space.  We didn't do that, and it was a conscious decision but I can't remember why!  We did, however, decide where the tap would go and cut the hole for it in the bath. 


The next thing to do was build the boxing at the end of the bath which will later be tiled.  It snowed that day but that wasn't going to stop our progress!


Boxing in place at the end of the bath

Because of the workings of the pop-up waste, and because of the style of the tap (the lever goes back), there wouldn't have been enough room to operate the tap if we had put it centrally at the end of the bath - the thickness of the tiles and adhesive on the wall would have prevented the tap opening fully.  We therefore had to position the tap slightly off centre - it's a design feature of course!


After fitting the pop up waste and tap, we had to get water to the taps which meant running pipes from the other end of the bath as we've turned the bath around to allow the shower screen to fit against the wall - the window slightly overhangs the width of the bath and so we had nothing to fix it to.  To give extra strength to the bath we fitted 'legs' to the wall underneath the bath frame at both ends.


Next on the list was to fit the wall units and get them level before bolting them together - something else which took longer than we hoped.  And (like the bath) not helped by the fact that the walls are not square!  We also had to decide where on the wall to place them - if we had fitted them tight up against the right hand wall, the tiles would have prevented us getting access to the cistern panel.  We've left a gap so that the tiles can go just behind the unit and I'll fill any gap which is left after it's been tiled with silicone.


After fitting the units we fitted the concealed cistern and checked the length of the flush pipe (hence the loo).

At that point, we discovered that the panel which fits behind the loo was damaged.  We'd already had to request a replacement cupboard door from Bathstore but we noticed the damage to the loo panel after the 14 day inspection period.  Although Bathstore replaced it very quickly without question, the replacement is also damaged and so we are awaiting a replacement for the replacement! 

We then had the scary part - cutting the worktop and fascia for the basin!  Although they supply a template with the basin which has a fold line which you position on the edge of the worktop, it's really easy to make a mistake - we know, we've done it before when we did our ensuite bathroom!  When you cut the fascia you have to allow for the thickness of the worktop and so you position the fascia section of the template higher up the fascia (by the thickness of the worktop). 

SUCCESS!!

The picture (below left) with the basin in situ does not convey the problems we had fitting it!  We fitted the tap and pop up waste first which wasn't too difficult, apart from getting the tap straight and tight - each time you tighten it, it's not straight and when you straighten it, it's not tight!  The basin fixing brackets are really difficult to fit inside the holes in the basin, bearing in mind the basin is 550mm wide and is fitted within a unit which is only 600mm wide - my husband spent the whole evening flat on his back with his arms up inside the cabinet whilst I was shining a torch up inside the cabinet - usually in the wrong place!  We eventually finished at 11.15pm!


On Friday evening we plumbed in the basin and connected the waste pipe - I say 'we' but my involvement was really just passing the right spanner at the right time!  This evening, my husband clipped the pipework to the wall whilst I fitted the hinges and push fittings to the cupboard doors - I obviously don't know my own strength as I managed to ruin one of the doors when I fitted the push fitting to the door (which is why there is only one door on the cupboard at the moment whilst we think of a fix!).  Anyway, we're now just about ready for the room to be tiled tomorrow!


And while the bathroom is being tiled, I will be writing my Christmas cards and putting up the tree and decorations which so far, I haven't had time to do - even the cats are thinking it's about time we started to get festive!


Sunday 14 November 2010

My Own Home - Bathroom Plans and Progress


The plaster is now dry and as of today, the lights are fitted - now that we can see what we're doing in the evenings, we can put the coving up!  Last week I put together a project plan and, according to my plan (with the exception of the shower) the bathroom should be finished on 19th December - I think that may be a bit optimistic!


Original bathroom - in all its green glory!

When I first started planning the bathroom I wanted a surface mounted basin but that would have required a deeper countertop which would have caused problems with access to the bath plumbing.  All the plumbing was along the outside wall but because the width of the bath extends slightly beyond the window, there is no way of fixing a shower screen and getting a good seal where it sits on the bath.  We decided to turn the bath round so that the shower and taps are at the other end.  As with our ensuite bathroom, we will be installing an Aqualisa Quartz shower, which uses a system of delivering the water via the riser rail so we don't need to channel out the wall for the shower and only need to extend the plumbing for the bath taps.  We also did that in our ensuite bathroom and it wasn't too difficult - famous last words!  There will be a gap at the end of the bath so we'll have to build some boxing which will then be tiled.


Having decided that a surface mounted basin wouldn't work, the next best thing was a semi countertop basin, and something to place it on!  I really liked the Jasper Morrison range by Ideal Standard, below left:


Jasper Morrison furniture
and sanitaryware

However, these units are both 650mm wide and we just didn't have quite enough room for them!  After a long search, we finally settled on the 'MyRoom' range from Bathstore, although not the wall units shown in this image as we have a window above the basin.  It's all arrived, although we haven't checked it yet .........


'MyRoom Oak' from Bathstore

We will be having the Jasper Morrison bath, sanitaryware and taps and these are being delivered this week (except the basin which is currently out of stock - maybe we will be having a countertop basin after all, in the form of a washing up bowl on the countertop!)


Jasper Morrison bath, semi-countertop basin, back to wall WC and basin filler


Having ripped out the old bathroom, and finally decided on the furniture and sanitaryware, I was able to draw up the plans:

  
The next step was to choose the tiles and decide whether to fully tile the walls, as they had been previously, or part-tile one (or two) of the walls.  I decided to part-tile two of the walls so that I can change the colour if I want to at some stage in the future.  We then had the ceiling plastered and partially skimmed the two walls which will not be fully tiled, ready for painting (when I know what colour I'm going to use!)


It took forever to choose the tiles, but eventually I've settled on the Elements range from The Tile Depot - I really liked the grey tiles from Porcelanosa but they would have been over budget by a long way!

Floor tiles (will all be grey, not chequerboard effect)

The majority of the wall tiles will be this creamy colour tile
which has a subtle brush-stroked design

In the centre of the bath (or possibly, just off-centre)
there will be one vertical row of these darker grey tiles
 (without the border), with silver strips either side

The elevations and isometric drawing below give a better idea of how this will look:


That's it for now - the bathroom currently looks like this:


I still have one more coat to do on the ceiling but will do that once we've put the coving up, hence the lamps dangling!  By the time I post an update I may have decided on the wall colour and have given some thought to the window treatment - possibly!


Thursday 11 November 2010

Bathrooms

As part of my second project I had to do a bathroom and thought I would use the opportunity to go back over my research for that project whilst sourcing products for our family bathroom (although the budget for our bathroom is not open-ended as it was for Saint-Jean Cap Ferrat!)


Axo drawing of the Saint-Jean Cap Ferrat bathroom

For this bathroom I chose these surface mounted basins from Stonewood (£445).  Although they're dark grey granite, it looks like I forgot to render them in this drawing (whoops!). 


For the taps I chose the Rettangolo Cascata by Gessi (price on application).  The soap dish is £137!!  Both are available through Chartley, and probably through other suppliers.  However, now that I look at the design of the basin, I think that a round tap may work better than a square one; something like the Eclix, also by Gessi (£285).

Rettangolo Monobloc Basin Mixer


Rettangolo Freestanding Soap Dish


Eclix Monobloc Basin Mixer


I also used the Stonewood cast resin bath (£2,850) and tap tower (with built-in TV!) - a mere £1,450!


Rather than use stone for the top of the tap tower I used dark grey granite to match the dark grey granite basins. 
I chose a walnut finish for the wood.

For my project I designed bespoke wall hung cabinets in walnut (with dark grey granite tops) and tall cupboards either side of the window.  Beneath the window I designed built-in seating with storage underneath - it was a requirement of the client that the bathroom should have plenty of storage.


The loo was definitely Laufen but I can't remember which one, although I know I would have picked one that I could easily draw by hand (the bath caused me no end of problems) - this project was before we had been taught CAD!  It may have been this one in the Ilbagnoalessi Dot range:


The large walk-in shower was by Hueppe.  I can't find the exact one now unfortunately, but this is similar:


The shower itself was by Roca and I think it was in their Neos range, similar to (if not the same as) the one shown below which is the Neos IV (£1,835)

roca neos iv


The radiator was called Kremlin by MHS (with optional towel rail).  This retails at £1,225 including the towel rail for the 1800mm tall radiator.


The tiles I finally chose for this project were Hemingway Scribble manufactured by BCT which I've just discovered have been discontinued.  I spent so long sourcing tiles and never really found what I was looking for!  In my mind I had something similar to the tiles below which I discovered in the best loos in Greece I have ever found!  If you have been to Greece, you will know that they are not renowned for their loos but these in Parga made me see them in a new light - so good in fact that I had to go back with my camera!


You may need to enlarge the picture on the right to see the detailing on the white tiles.


There are so many tiles on the market to choose from, but here are a few of my favourites ........


The tiles above and below are Porcelonasa (who also do bathrooms - and kitchens)


The tiles above and below are by Laura Ashley,  (although I don't think you can buy the tiles direct from Laura Ashley direct so you would need to buy them via a distributor, such as Homebase).


The tiles above are by Villeroy and Boch


Tiles can add a huge amount to the cost of a bathroom and we won't be having Porcelanosa or Villeroy and Boch tiles in our family bathroom!

Having breathed a sigh of relief and finally said goodbye to the last of our coloured bathroom suites, it seems that they could be set to make a comeback!  I saw in Homes & Gardens (December 2010) that Villeroy and Boch have introduced a purple basin in their Loop & Friends range (they may call it cassis but I haven't been able to find a picture of it, other than in Homes & Gardens magazine).


Villeroy and Boch Semi Surface Mounted Basin

If coloured bathrooms are your thing, Ambiance Bain do moulded resin basins and countertops.


Although we were not required to prepare a lighting plan, we were asked to consider lighting and the different types of lighting you would need in a bathroom.  For decorative lighting, I chose these LED uplighters which also contain Swarovski crystals.


My next post will be the progress of our family bathroom!   To maximise the space in this (very) small bathroom we will be installing fitted furniture so that we can hide all the pipework and give the impression of a bigger space. The plaster is now dry, I've painted the ceiling and the cabinets have arrived.....although, as yet no bath etc, and the basin is currently out of stock!  Completion by Christmas is not looking likely!

Please see the links for some of the major bathroom suppliers.